UCSC Genome Browser Custom Track Tutorial
The UCSC Genome Browser allows users to load their own annotations by adding Custom Tracks. Custom tracks work well for quickly displaying data and are automatically discarded 48 hours after the last time they were accessed.
This tutorial introduces the Custom Track interface and demonstrates how to:
- Select a genome and assembly
- Define a region of interest
- Format the custom track
- Load a custom track into the Genome Browser
- Manage custom tracks
Learning materials
Custom Track Overview
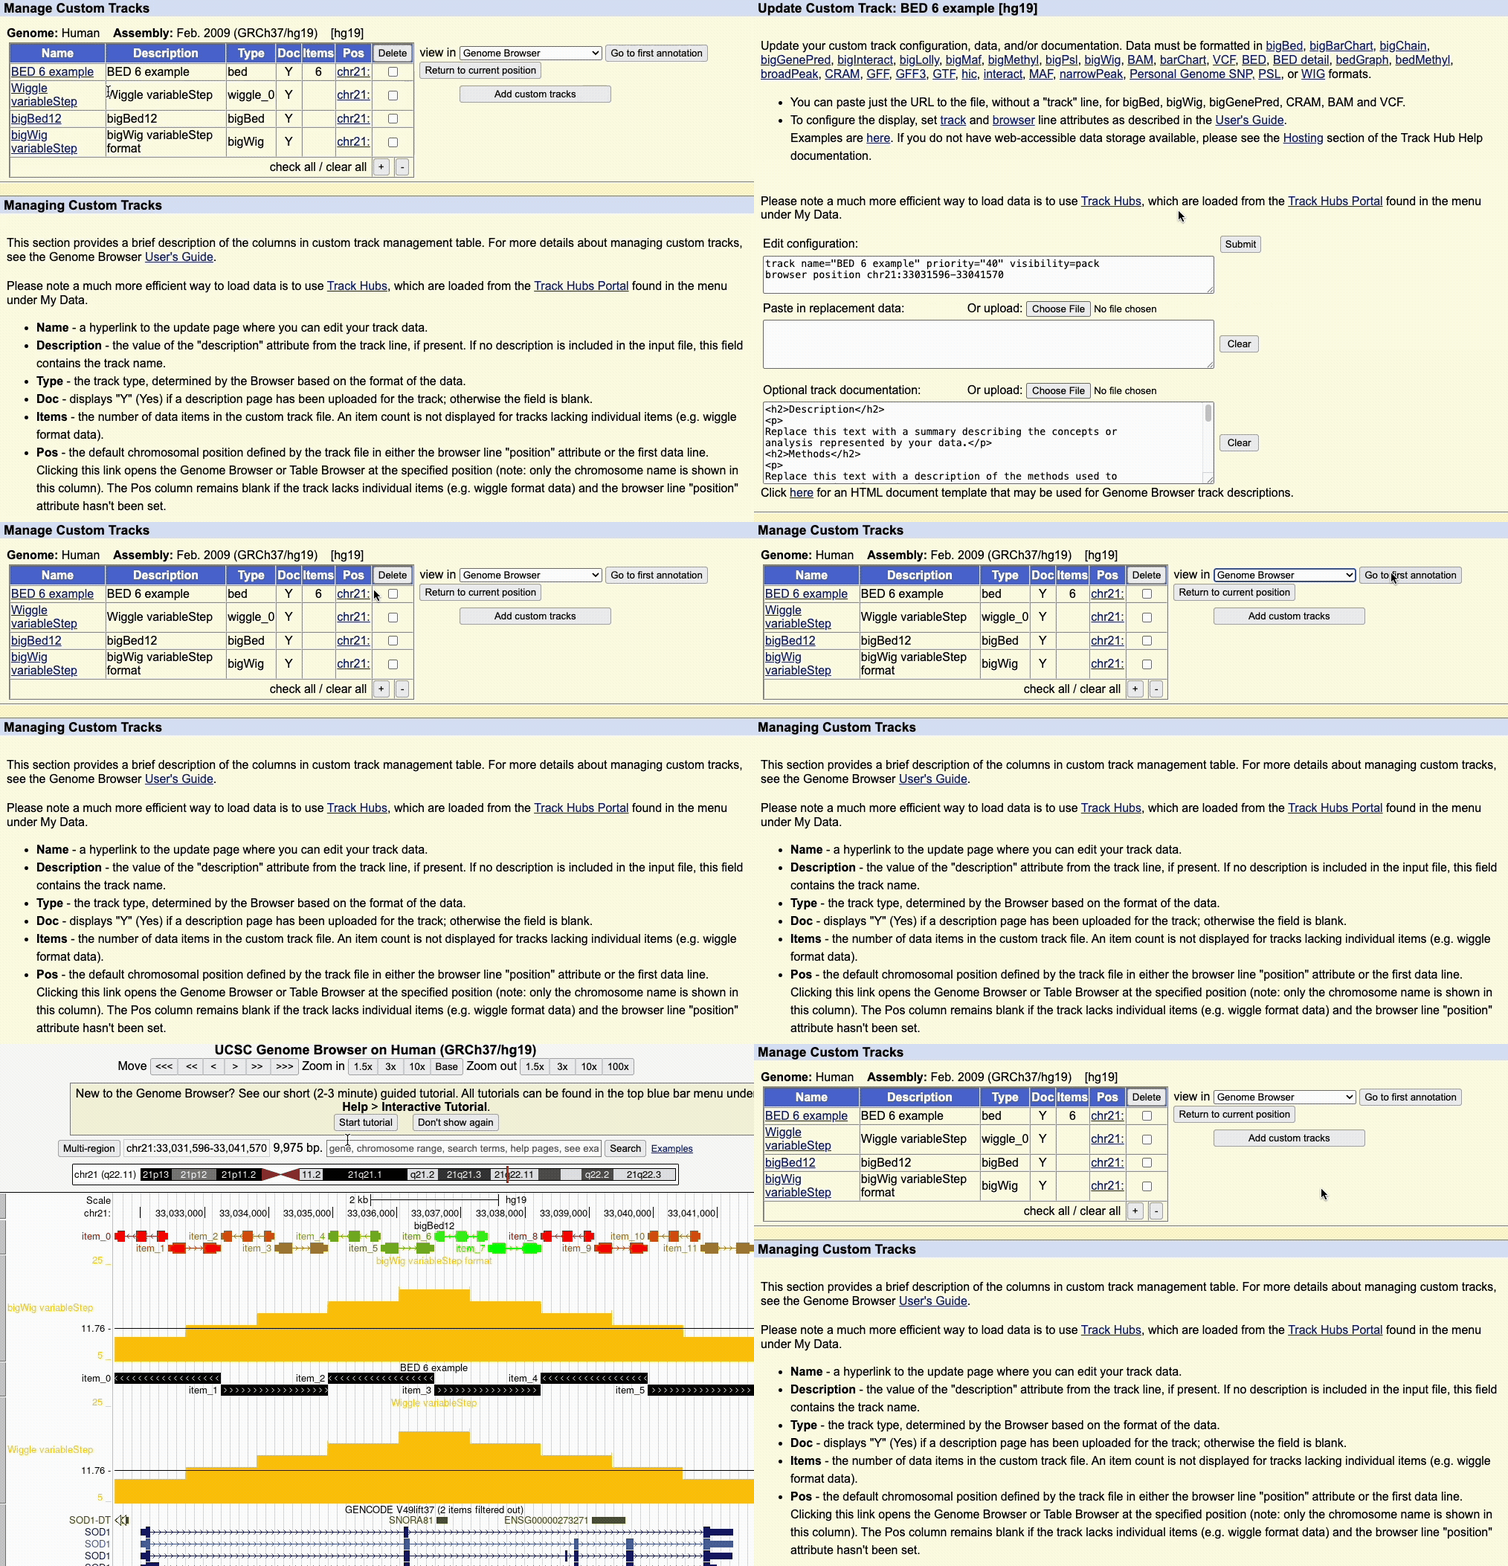
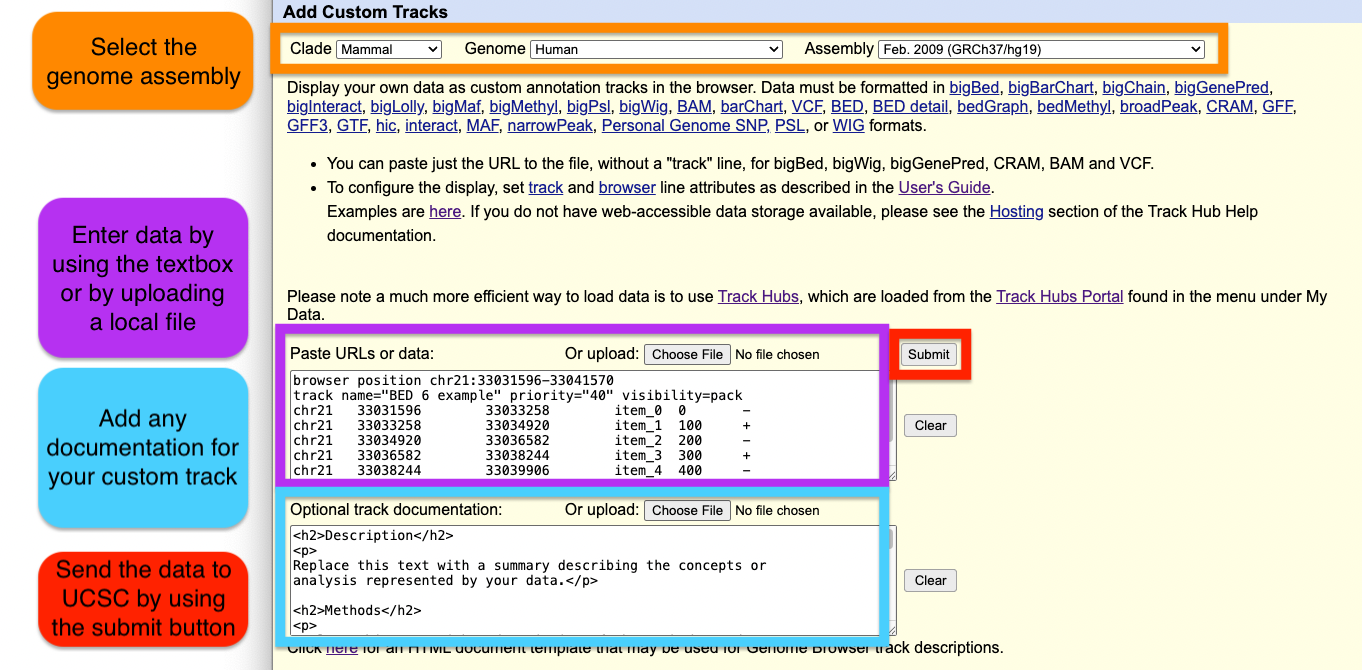
A screenshot highlighting the layout and key elements of the Custom Track interface.
Guided Walkthrough
Step-by-step guidance for using the Custom Track interface to upload data for your analysis.
Interactive Tutorial
An in-browser walkthrough that introduces the Custom Track interface and workflow.
Custom Track Overview
Add Custom Tracks
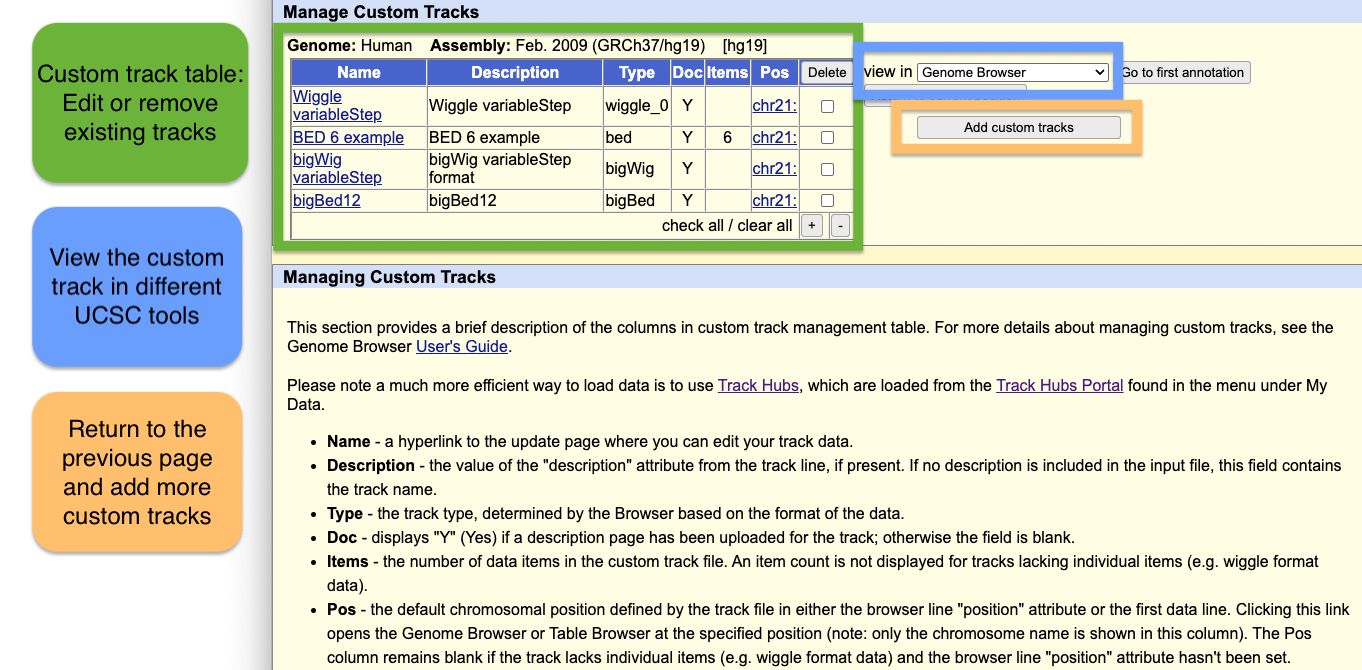
Manage Custom Tracks
Guided Walkthrough
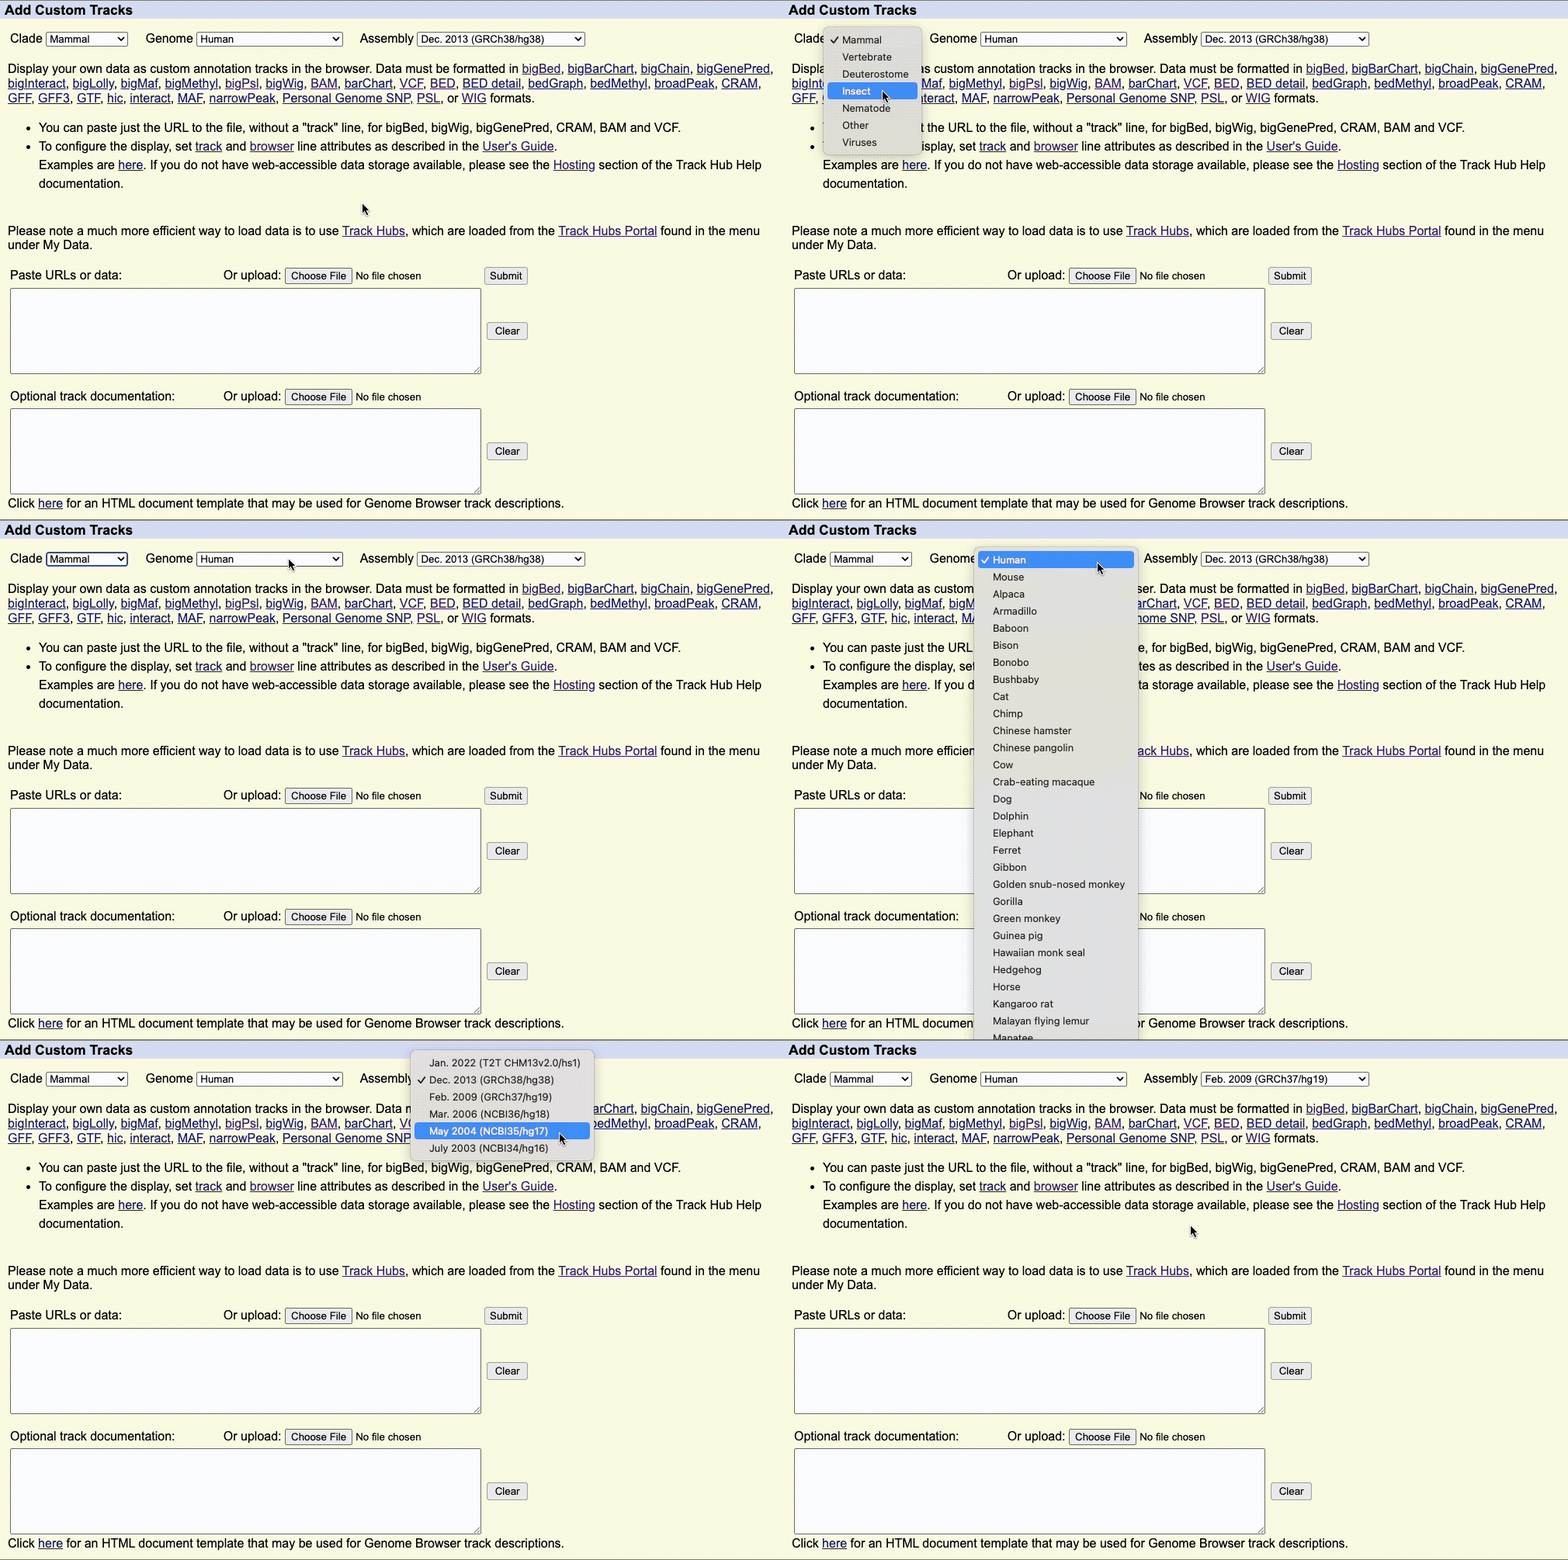
Step 1: Select Your Assembly
Use the Change selected genome search box to switch assemblies. Type a species name, common name, or assembly ID, then choose one from the list. Current Genome shows which assembly is active.
Step 2: Create a browser line
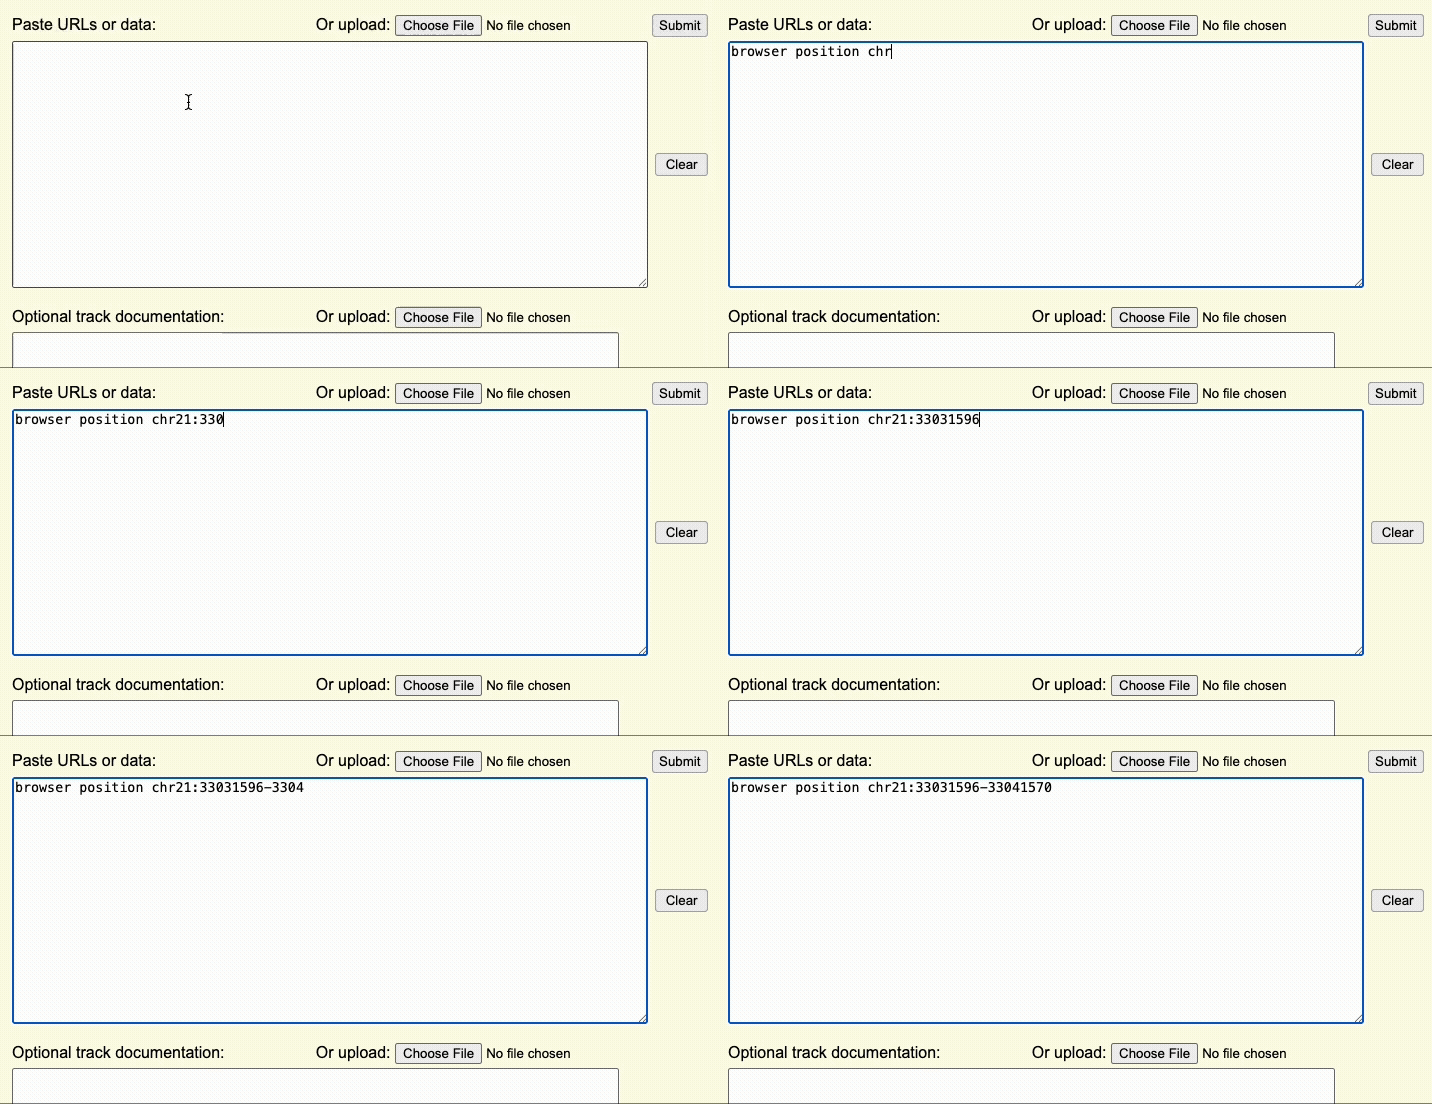
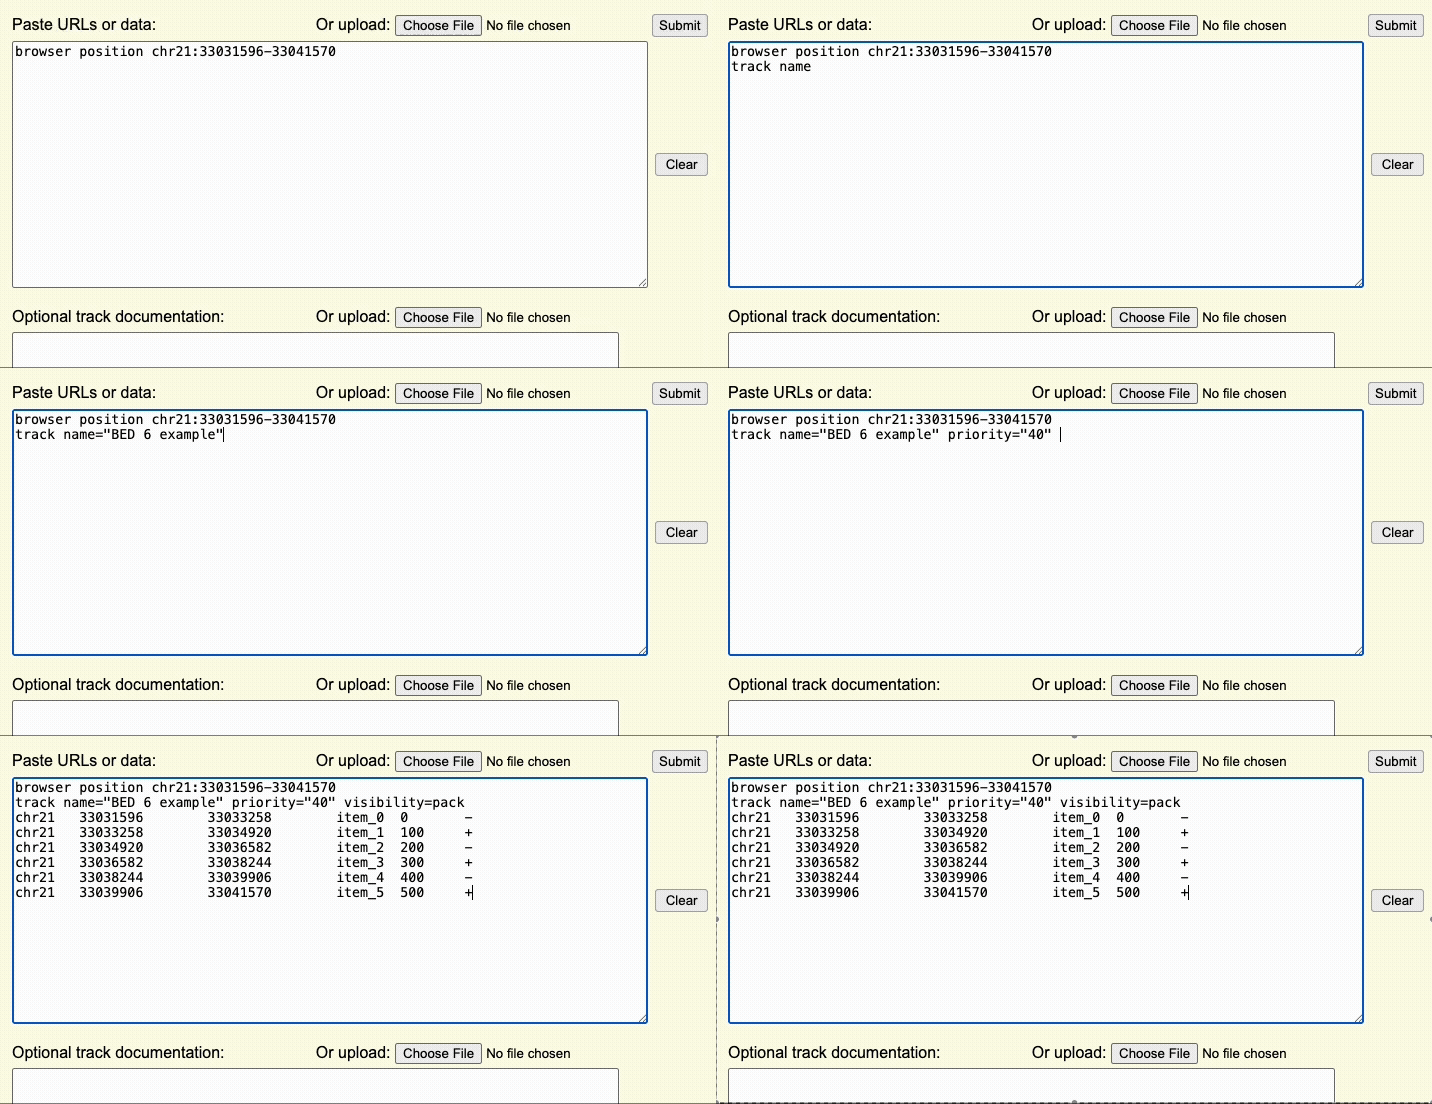
The browser line controls where you are first taken after uploading the custom track. This step controls the aspects of the overall display window.
For example, if the browser line browser position chr22:1-20000 is used,
the Genome Browser window will initially display the first 20,000 bases of chromosome 22.
Browser lines are in the format:
browser attribute_name attribute_value(s)The track line
Along with the browser line, a track line sits above your data and sets what the track is called and how it looks. It is optional for a quick look, but worth adding if you plan to keep or share the track. Common attributes:
name— the short label shown to the left of the trackdescription— the longer text shown in the track's title and details pagevisibility— how the track is drawn:hide,dense,squish,pack, orfullcolor— the feature color as RGB values, for examplecolor=0,0,255for blue
A track line looks like:
track name="My variants" description="Sample calls" visibility=pack color=0,0,255For bigBed, bigWig, bigGenePred, CRAM, BAM, and VCF files you can skip the track line and paste just the URL to the file, one per line.
Step 3: Format the Data
The annotation data must be formatted into one of the supporting formats. For many formats, chromosome names can either be UCSC-style names (e.g. 'chr1', 'chrX') or aliases from other sources (e.g. '1' or 'NC_000001.11').
While most data types can be uploaded directly to UCSC, any of the binary-indexed files must be hosted on an external server. This includes formats such as bigBed, bigWig, BAM, VCF, and other big* files.
A few hosting resources that we recommend can be found on the Hosting help page.
Step 4: Load the custom track
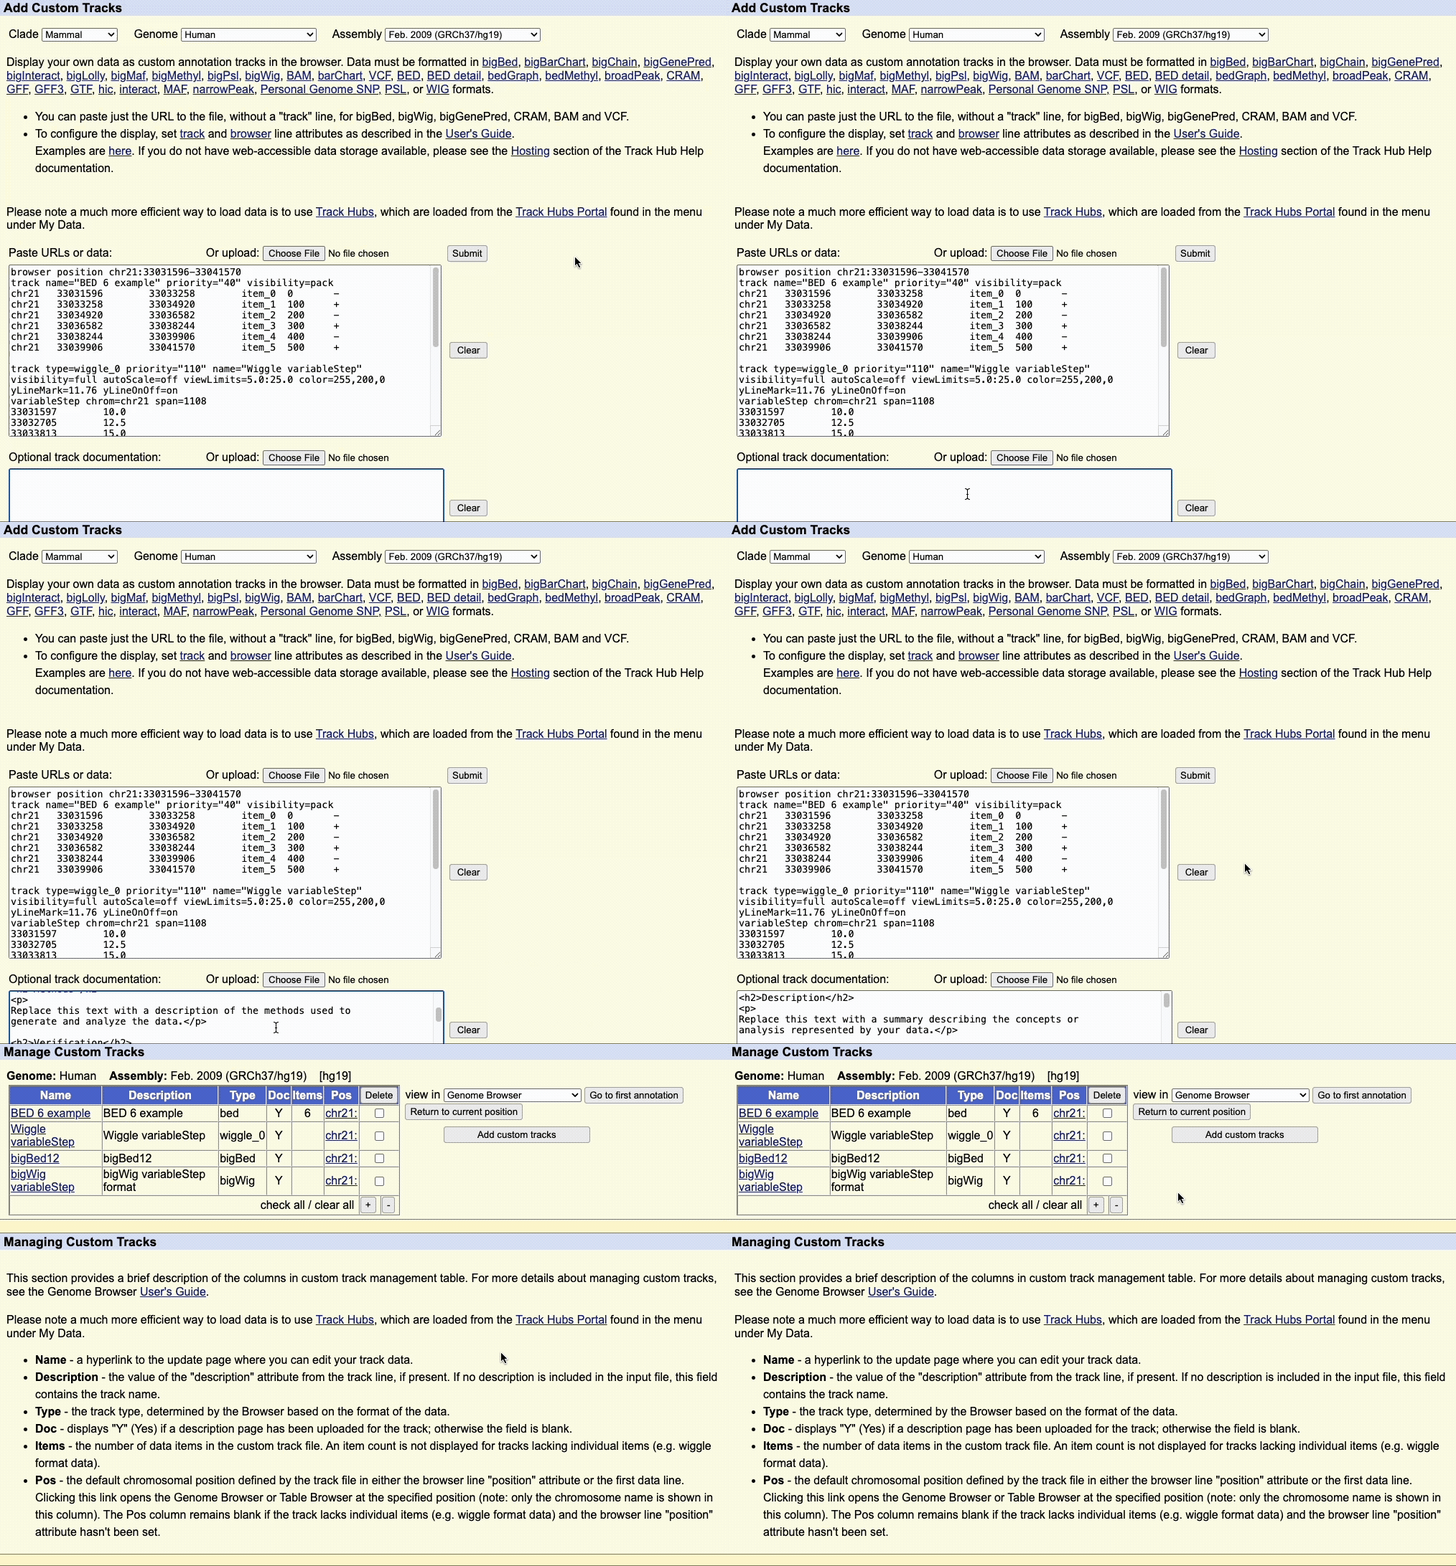
Once the Browser and track lines are created, you can upload the custom track to the UCSC Genome Browser using the dialogue box or the button to upload the custom track file.
When using a custom track file, you can also paste the URL to the custom track to quickly load your annotations.
We recommend adding documentation to your custom annotation tracks, especially if you intend to share the annotations with other collaborators.
Step 5: Manage custom tracks page
Click to upload the data to the UCSC Genome Browser. You will be taken to a new page where you can view all your uploaded custom tracks. Here, you can edit the annotation data, or remove any custom tracks.
There is also a drop-down menu to view the data in other tools, such as:
- Genome Browser
- Table Browser
- Data Integrator
- Variant Annotation Integrator
Clicking on the chromosome hyperlink, e.g. chr21, in the table will take you to the Genome Browser image to view the data.